Showing posts with label custom recovery. Show all posts

Sunday, May 26, 2013

Install ClockworkMod Recovery on Sony Xperia Z with Locked/Unlocked Bootloader [GUIDE]

Sony's flagship smartphone, the Xperia Z, was rooted even before the device could go on sale with due credit to the developers' community. Now ClockworkMod (CWM) recovery can be installed on the phone. Using the CWM recovery users can perform several functions such as installation of custom ROMs and system tweaks.
The Xperia Z features a 5in full HD display.
Below are two different methods to install CWM recovery on Xperia Z: one for Xperia Z with locked bootloader and the other for unlocked bootloader version.  
The custom recovery file, which is built from CWM 6.0.3.0 sources, for Xperia Z with unlocked bootloater is released by XDA developer, DooMLoRD. The developer notes that the aforementioned recovery file works only on Sony Xperia Z running on stock firmware 10.1.A.1.350/434 or any ROM based on the same firmware. Head over to the development page to learn more about the custom recovery release. The CWM recovery 6.0.2.8 for Xperia Z with locked bootloader is shared by XDA developer, krabappel254.
Xperia Z users who wish to install CWM Recovery on their devices, may follow our step-by-step guide below. Users should have a rooted version of the phone. Click here for step-by-step guide to root the Sony Xperia Z.

Pre-requisites
1) Install USB Driver for Sony Xperia Z to transfer files between the computer and the Android device.
2) Enable USB Debugging Mode on the phone to connect it with the computer and use Android SDK with it. [Press Menu>> Settings>> Applications. From there navigate and click on Development option and ensure the USB Debugging Mode is turned on.] 
3) The device should have ADB (Android Debug Bridge) and Fastboot installed on the phone.
4) As the tutorial might wipe out all the data on the device, create a backup. If the device has a custom recovery such as CWM/TWERP already installed, users are recommended to back up the data using the same.
5) Ensure that the battery of Xperia Z has above 80 percent charge.
6) The recovery files and the installation tutorial below are compatible only with Sony Xperia Z. Applying these to any incorrect variant is likely to brick the device. Therefore, install the recovery files accordingly.
Steps to install CWM Recovery on Xperia Z with unlocked bootloader
1) Download CWM recovery 6.0.3.0 for Sony Xperia Z to the computer. Extract the downloaded zip file to get the boot.img file
2) Ensure that a working fastboot is already installed on the phone [For guide click here]
3) Turn off the Xperia Z. Then enter into fastboot mode by pressing the Volume Up button
4) Connect the phone to the computer using USB cable
5) Wait until the LED lights up with blue colour. Try few more times if the first attempt fails
6) On the computer, copy the boot.img file into C:Fastboot
7) Open the command prompt on the computer. Go to Windows logo then type CMD in the search box and press Enter
8) Type cd C:fastboot then type fastboot flash boot boot.img
9) Once the action is completed, try to restart the device
The Sony Xperia Z should now have CWM recovery installed.
Steps to install CWM Recovery on Xperia Z with locked bootloader
1) Download CWM Recovery 6.0.2.8 for Sony Xperia Z with locked bootloader to the computer. Extract the downloaded zip to get the install.bat file
2) Ensure that a working fastboot is already installed on the phone
3) Double click the install.bat file
4) Plug in the USB cable to the phone to connect it with the computer. Wait until the device is detected by the programme
5) Follow the screen instruction from the programme to continue installation
6) When the installation process is completed, switch off the phone
7) Press the Volume Up or Volume Down button and release for some time when the phone is booting (with LED is green)
8) Boot the device into the custom recovery [Try some more times if the first attempt does not work]
[Source: The Android ROM]

How to Root the Sony Xperia Arc S

Sony-Ericsson-XPERIA-Arc-root
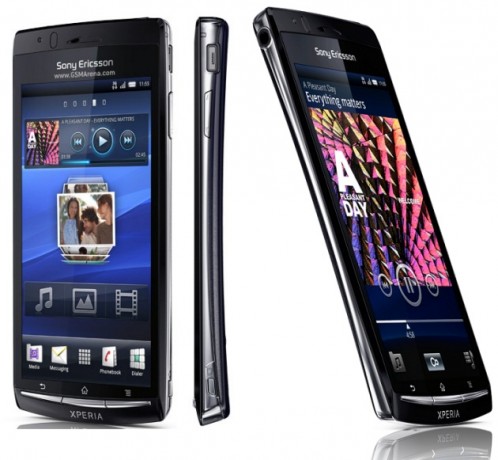
The Sony Xperia Arc comes with a 4.2-inch LCD display, a 8MP shooter and a 1GHz Scorpion processor keeping things running at its mid-range speed.  The device recently saw an update to Android 4.0.4 officially but there’s no word as yet on whether there will be an official Jelly Bean upgrade.  Until then, there are custom ROMs to try out and to do that, your Arc will need to be rooted.  This post below will help you do that.

I.  Before You Begin

1.  Make sure that your device is at least 75% charged.
2.  The guide below is designed to work on Windows PCs (preferably Windows 7); sorry Mac/Linux users!
3.  Back up everything you feel is important before you begin.
4.  This procedure is designed to work on Xperia Arc devices running firmware v4.1.B.0.587.  So make sure this is the firmware versions you are running before you proceed.

II.  Necessary Downloads

1.  Flashtool v0.8.6.0.
2.  Lt18i_4.1.A.0.562_Kernel.ftf (Link available in the first post under the Downloads section)
3. DooMLoRD_v1_Xperia-2011-ICS-ROOT-emu-busybox-su.zip (Link available in the first post)

III.  Flashing the .562 Kernel

1.  Double-click on flashtool.exe you downloaded above and follow the on-screen instructions to install it.
2.  Copy Lt18i_4.1.A.0.562_Kernel.ftf file you downloaded above to C:\Flashtool\firmwares on your harddrive.
3.  Open the Flashtool application after installation and click on the Flash icon (the one with the thunder symbol).
4.  You should be presented with two options:  Flashmode and Fastboot Mode.  Select Flashmode.
5.  Choose Lt18i_4.1.A.0.562 and click on OK.  Follow the on-screen instructions on how to boot your device into fastboot mode and connect your device.  Also, make sure”No Final Verification” is marked.
6.  Reboot device.

V.  Rooting the Xperia Arc

1.  Enable USB Debugging on your device.  You can do this by heading to Settings > Applications > USB Debugging and checking the tickbox next to it.
2.  Enable installation of non-Market applications.  To do this, go to Settings > Applications and check the Unknown Sources tickbox.
3.  Enable MSC Mode.  Go to Settings > Xperia > Connectivity > USB Connection Mode and select MSC Mode.
4.  Connect your device to your Windows PC.
5.  Extract the DooMLoRD_v1_Xperia-2011-ICS-ROOT-emu-busybox-su.zip that you downloaded above to a folder on your desktop.
6.  From the extracted folder, double-click on runme.bat to run the DooMLoRD tool.
7.  Follow the on-screen instructions and wait for the process to be complete (your device will reboot several times during the procedure).

V.  Flashing Custom Recovery (Optional)

If you would like to flash a custom recovery image in order to flash custom ROMs, head to the next procedure to learn how to do that.
If this procedure helped you please thank/donate to the original developers here.
If you need help with this procedure, please ask in the comments below or in the forum.
This is part of our Android How To’s. We have how to’s on rooting, loading ROMs, and tons of other tips and tricks for your specific device or for Android devices in general! For all of our Android How To’s, head here.

Tuesday, May 21, 2013

How to Root Samsung P7500 Galaxy Tab 10.1


This thread is here to make the lives of every one just that much easier. Will try to keep the first and reserved posts as up to date as humanly possible.

Please ask all questions in relation to issues you are having following the FAQ instructions to make it easier to answer your questions and easier for us to track the solutions that way the FAQ post is as up to date and accurate as possible.

As the GT10.1 landscape changes this thread will get updated. I will try and keep everything as simple and to the point as possible. Contributors will be much appreciated.

THE BASICS

BOOTLOADER MODE

Turn device off. Then hold down power + volume down button (the button closer to power button) until you see two icons appear then let go. Left icon (box) is recovery and right icon (Android robot) is Download. Use Vol. down to navigate then vol. up to select.

DOWNLOADING MODE

Just tap volume up when you have highlighted the android robot icon. You should see downloading appear under the icon.

RECOVERY MODE

Vol. up/down to navigate up or down and power button to select.

This is what you use to install ROMs/KERNELs and even themes for your specific roms when they become available. Just highlight the box icon and hit Vol. up. What we are doing now is replacing the stock recovery on your device with Clockwork Mod Recovery which allows you install unsigned ROMs/Kernels/Updates. When in recovery mode you can also back up whatever current ROM you have on your device so if you install a new ROM and something goes wrong you could always use recovery to restore. Whenever you install a new ROM it's advised to always wipe the device using cwmR to ensure a more stable install. Install new ROMS will also mean you will be losing all the apps on your device. It will look like you have a brand new device after the install unless its an update.zip for whatever rom you are currently on and the developer of that rom supports it.

Don't worry about losing your apps as you can always re-download them once you sync your device with your google account. However, the state of those apps and your settings will be lost, so I strongly suggest that you use an app like titanium back up and always make a back up of your apps before flashing any new ROMs. Check in the Recommended Apps section for a direct link to Titanium backup.

Here is the clockwork mod menu

- Reboot system now (self explanatory )
- Apply update from SDcard. (when you connect your device to your computer it will show up as tablet. The SDcard that cwm refers to is simply your device storage. Always make sure to copy install.zips to the root directory of your tablet storage.) You use this when applying an update for a specific ROM if that is what the ROM developer says.
- Wipe Data/ Factory Reset You should always do this before you install a new ROM or if you are having minor issues with your device.
- Wipe cache partition Think of this as the lite version of whats above . If you do above though it doesn't hurt to do this too.
- Install zip from SDcard Use this to install new ROMs.
- Back up and Restore
- Mounts and Storage use this to connect your device to your computer when in recovery mode. It is also possible to transfer files to your device while in this mode.
- Advanced What you are interested in here is something called dalvik cache, you want to wipe this too before installing any new ROM
- Power off

CLICK ME FOR ALL TERMINOLOGY DEFINITIONS

NVFLASH

Nvflash is a low level formatting and imaging tool. If you don't have a working recovery, or have broken the actual boot-loader on your tablet, this is the tool you will need to turn to. For those with unlocked bootloaders (and no fastboot capability), its the best way to root your device. Nvflash is pretty much NVida's version of say an ODIN program but done through cmd prompt. It can save a tablet if one is soft/semi-bricked or maybe full-bricked. To use nvFlash you must first put your tablet in APX mode (think of it as a way to allow you use commands on your computer to control your tablet).

Refer to this thread for downloads and instructions.


So off we go.

ROOTING YOUR TAB

GO TO SamsunFirmware.com AND DOWNLOAD A STOCK FIRMWARE FOR YOUR TAB VERSION> KEEP IN SAFE PLACE!!!!!!! You are already on the right page just scroll down.
Courtesy of RoboBear


GOOGLE I/O & RETAIL WIFI VERSION
[GTP7510]


DOWNLOADS compiled and hosted by tphillips

Content - GT-p7510_USB_Driver | hc-3.1_ota-full_sam_tab_10.1.zip(StockROM) | Odin3_v1.85 | recovery-cwm_4.0.0.4-sam-tab-10.1.tar.md5 | stockretail.tar.md5(recovery) | Samsung_Galaxy_Tab_10.1_root

Download FilesForDummies.zip here
Mirror 1
Mirror 2


DONT WIPE during any part of this process. Make sure to put the stock rom from the download package on your device/use CWM and do a backup of your rom before you start anything in case something goes wrong. You have been warned!!!!!

1. Install samsung USB driver or download samsung Kies and install on your computer which will in turn install the drivers for you.

2. Run Odin.exe, choose PDA and point it to recovery.md5 file.

3. Connect tab via usb to your computer while in downloading mode then hit start in Odin on computer after connection has been established. Run, wait then reboot.

4. Connect tab to computer in usb storage mode (make sure usb debugging is off in tab settings) copy root exploit (Samsung_Galaxy_Tab_10.1_root.zip) to you tablet and take note of where it is. You can skip this part i fyou downloaded this file with your tablet.. Turn off tab. Reboot into bootloader again but this time go to recovery. Select to install zip from SDcard. navigate to where the root.zip is. Install the root.zip. Reboot into android. Your tablet is rooted.

5. Done.

You can also refer to this well made Video showing the whole procedure or this other awesome video by Dansan682.


RETAIL 3G
[GTP7500]


1. Download this Root.zip file to your tablet and move it to root directory of tablet storage. (you can also download on comp. then transfer to tablet)

2. Reboot tab and go into recovery mode and apply the root.zip you just downloaded.

3. Then reboot

rooted already

For CWM [B]

1. After rooting download and install Rom Manager from market.

2. open Rom Manager app and have it install clockwork Mod to your device, you should see your device listed within Rom manager.

3. Done.

Courtesy of Robobear

RETAIL 4G
[GTP7500]
courtesy of poitee

Downloads

Kernel.zip
Recovery.zip

1. Copy Files to root of device storage.
2. Boot into Bootloader mode and navigate to and enter recovery mode.
3. Apply Kernel.zip then recovery.zip
4. reboot.....Done.

UNROOTING & RESTORING STOCK RECOVERY

1. Using CWM Flash the stock rom for your device. This unroots your device and basically makes it like a brand new tablet.

2. Use Odin to flash the stock recovery from the filesfordummies.zip.

3. Done, your device is exactly how it was when you picked it up.


FLASHING ROMS AND KERNELS


This is pretty easy as long as you have CWM on your device.

Simply boot CWM recovery, navigate to either update/instal zip from SDcard (pls adhere to ROM/kernel install instructions) and flash the .zip file of the ROM or kernel.

I will update this section with links to all the existing and stable ROMs and kernels as the become available. I will advice that you hold off on the kernels if you can as every stable kernel will eventually get cooked into a ROM unless of course you want to help test them or be on the bleeding edge .

AVAILABLE ROMS & KERNELS
LEGEND

- WIFI
- 4G
- 3G

★ - Custom ROM
- Kernel

If your Device is supported the stars will tell you all you need to know.

[ROM]Stock US Retail WiFi in case something goes wrong
[Solution] HC 3.1 OTA Stock ODIN
[ROM]Stock|EU|Wifi|Retail|Touchwiz
[ROM][STOCK][ARABIC][AUG'13]W/ Official TOUCHWIZ
[ROM][CWM] 3.1|WiFi|Touchwiz UX|DEODEXED
[ROM][CWM] 3.1|WiFi|Touchwiz UX [UPDATE: New WiFi Base Rom]
[ROM][CWM]3.1|WiFi|Bonsai ROM|ToucWiz option|
[ROM][CWM]3.1| Blazar TW Rom|OC 1.6GH Kernel|Prerooted| by Poitee
[ROM] [CWM]3.1|StarBurst ROM| by PhantomHacker
[ROM][CWM][EUR][3G] BroodComb G-P7500 XWKG9 [ALPHA]
[ROM]Task650's KME ROM UEKME Touchwhiz
[KERNEL] 3.1|WiFi|OC 1.4GHZ| by Pershoot
[ROM] LiquidSpeed>>> New!!!
[KERNEL] 3.1|WiFi|OC1.6GHZ|Voltage Control|Voodoo Sound|CIFS-NTFS| by Poitee
[TABUNTU] Galaxy Tab 10.1 NATIVE Ubuntu WIFI now with a video


IRC ONLINE CHAT

Drop in HERE if you need some Help . #gtab


ROM/KERNEL/THEMES/UPDATES BETA TESTING!!!!

Ever wanted to get whats coming before anyone else (never mind the small issue of being a guinea pig ) Well here is your chance. In this section I will put up the contact info of any dev currently looking for testers and for a limited duration, once the devs has all their testers his link will be closed. You can also think of this section as a great way to see what is coming and what stage of development its in. So stop just downloading stuff people, now you can actually really contribute to making what gets released the best it can be and as bug free as possible.


FAQ

Be sure to ask whatever questions you have in relation to anything and any problems you come across. But please start every question you have with either a

(Q) basically letting me know its a question or a
(P) letting me know its a problem

I will put up all your questions or problems on here so everyone can see them and the answers or fixes . this way people won't have to filter through tons of pages to get help.


(Q) Should I follow these instructions for an IO edition tab? Or should I just use the fastboot flash [cwm recover] and flash the zips through that?
(A) This method will work on the IO version.

(Q) kernel 2.6.36.4 is a NO-GO for the 3G version?
(A) Yes, it doesn't work on the 3G version yet.

(Q) If my tab ins locked does that mean i cant flash kernels on it?
(A) You can flash anything as long as you have a recovery that will support it. In our case CWM. Being locked and unlocked really only stops you from flashing stuff "easily" but since we can change the recovery, we can flash anything.

(Q) Does the Odin file wipe tab?
(A) No. All Odin is doing here is flashing a new recovery to your tab. Nothing more.

(P) Can't see tablet as USB storage device on Mac.
(A) Unfortunately Android and Macs don't play nice... you best bet is to use dropbox or a simple bluetooth transfer to transfer files from your mac to your tablet. Then on your Tab use a file manager app to move your files to where you want them to be. For now. Another option is to download everything that requires you using CWM with your tablet so its all already there. So in CWM all you have to do is navigate to your downloads folder. I just created a folder called mods and I have them all there.

(P) Stuck in BootLoop after Flashing ROM via Odin.
(A) You should use nvFlash to falsh CWM if you don't still have it then do a full wipe of your device including reformating all partions in mounts and storage except the boot partition then using Odin install a stock Rom on your device.

(P) I messed things up on my LTE tab and I now somehow dont have a recovery mode anymore!!!!!
(A) Go Here and scroll to post #4 and follow tijayz instructions.... make sure to thank him!!!


USER TIPS AND RECOMMENDED APPS

TIPS

1. Working Hulu

2. How to utilize the entire screen for setting widgets and icons without the 1inch gap on the sides? Use ADW launcher EX

3. Rotation Lag Fix

4. Look here for a Mod to permanently set your browser user agnet to desktop. No more mobile sites.


RECOMMENDED APPS!!!!!go on!!, find an awesome app and suggest it to be added to this list!!! Only android market or direct .apk links so isers can download and install straight from their devices

Titanium BackUp
Circle Launcher
ADW Launcher EX
Beautiful Widgets
CNN
Minimalistic Text
Thumb Keyboard
Tablet Keyboard
XBMC
PLEX
Playstation Emulator
SNES emulator
Multipicture Live wallpaper. Kiss weirdly cropped wallpapers goodbye
Wallpaper Slideshow
Dolphin Browser HD
Pulse news Reader
AutoDesk SketchBook Pro
Feedly
File Manager HD (honeycomb)

[SAMSUNG GALAXY S3 TOOLKIT V7.0] Drivers, Backup, Root, CWM, BusyBox + MORE [VZN]

INTRODUCING THE SAMSUNG GALAXY S3 UNIFIED TOOLKIT

IMPORTANT: THIS TOOLKIT SUPPORTS 14 DIFFERENT S3 VARIANTS AT THE MOMENT SO MAKE SURE YOU SELECT THE CORRECT MODEL FOR YOUR DEVICE IN THE MODEL SELECTION SCREEN OR INCORRECT RECOVERY/BOOT IMAGES WILL BE DOWNLOADED WHICH COULD SOFT BRICK YOUR DEVICE.

Quote:
SUPPORTED MODELS

INTERNATIONAL [GT-I9300] SUPPORT THREAD HERE

AUSTRALIAN MODEL GSM [GT-I9300T]

INTERNATIONAL [GT-I9305/GT-I9305N] SUPPORT THREAD HERE

AUSTRALIAN MODEL LTE [GT-I9305T]

C SPIRE MODEL LTE [SCH-L710]

AT&T US [SGH-I747] SUPPORT THREAD HERE

BELL, ROGERS, SASKTEL, TELUS [SGH-I747M] [SGH-I747M] USE AT&T SUPPORT THREAD

US CELLULAR MODEL LTE [SCH-R530] USE AT&T SUPPORT THREAD

METRO PCS MODEL LTE [SCH-R530M] USE AT&T SUPPORT THREAD

SPRINT US [SPH-L710] SUPPORT THREAD HERE

TMOBILE US [SGH-T999] SUPPORT THREAD HERE

MOBILICITY, VIDEOTRON, WIND [SGH-T999V] USE TMOBILE SUPPORT THREAD

VERIZON US [SCH-I535] SUPPORT THREAD HERE
FUNCTIONS OF SAMSUNG GALAXY S3 UNIFIED TOOLKIT V7.0 [10TH JANUARY 2013]
  • Install drivers automatically
  • Backup/Restore a single package or all apps, user data and Internal Storage
  • Backup your /data/media (virtual SD Card) to your PC for a Full Safe backup of data
  • Perform a FULL NANDROID Backup of your system via adb and save in Custom Recovery format on your PC
  • Pull /data and /system folders, compress to a .tar file and save to your PC
  • Auto Update ToolKit to latest push version on startup (donator feature)
  • Backup/Restore your /efs partition
  • Dump selected Phone Partitions, compress to a .zip file with md5 and save to your PC
  • Install BusyBox binary on phone
  • Root any public build INCLUDING JELLY BEAN (different options available)
  • [B]Root with Superuser (ChainsDD) or SuperSU (Chainfire) via CWM (works on ANY build)
  • Flash Stock Recovery
  • Install any zip file via Sideload feature in Recovery
  • Flash CWM Touch Recovery (thanks to TeamEpic) or CF-CWM Recovery (thanks to Chainfire)
  • Rename Recovery Restore files if present
  • Flash Insecure Boot Image for adb mode
  • Flash Stock Boot Image back to your phone
  • Create tar file to flash via Odin with 1-click process
  • Download, Extract and Flash Stock Rom (full DETAILED steps) ESSENTIAL FOR WARRANTY RETURNS
  • Rip cache.img to zip file in CWM format for editing and flashing (thanks to Adam Lange)
  • Install a single apk or multiple apk's to your phone
  • Push Files from your PC to your phone
  • Pull Files from your phone to your PC
  • Set Files Permissions on your phone
  • Dump selected LogCat buffers to your PC
  • Dump BugReport to your PC (if installed)
  • Help, Information Screen for various tasks
  • Mods Section to Modify your phone
  • Reboot Phone options in adb mode
  • Change background, text colour in ToolKit
  • Activate Donator features from within the ToolKit
--------------------------------------------------------------

**CLICK HERE TO DOWNLOAD THE SAMSUNG GALAXY S3 TOOLKIT V7.0**
INCLUDES MODSSECTION V3.0

Mirror (MediaFire) of V7.0 being uploaded

NOTE: As this update is soo big and pretty much every file from previous versions has changed an Auto Update to V7.0 is not possible because the update would be the same size as the full download and I am not permitted to host that size file on my server. Please download and install the full version from the link above. Donator codes will still work on the current version and enable future Auto Updates and donator features.

NOTE: As the exe files are not Digitally Signed with a Microsoft Certificate they 'may' get picked up as potentially harmful by Antivirus Programs and deleted on first run. If this happens restore the file and exclude it from future scans to use it. This seems to happen mostly on AVG Free and Norton which is why I switched to BitDefender which is much better.

IMPORTANT: ONLY FLASH ROMS THAT ARE SPECIFICALLY MADE FOR YOUR PHONES MODEL NUMBER AS FLASHING AN INCORRECT ROM CAN POTENTIALLY BRICK YOUR DEVICE!

Credits: ChainsDD for Superuser, Chainfire for SuperSU and modded cwm, koush and the clockworkmod team for cwm touch, twrp team, ausdim for cwm port to I9305

--------------------------------------------------------------

(Changelog at the Bottom of Post#1)


PLEASE READ THE *FAQ* IN POST#2 BEFORE ASKING QUESTIONS

--------------------------------------------------------------

2. USING MSKIPS' SAMSUNG GALAXY S3 UNIFIED TOOLKIT

a. Download the Samsung Galaxy S3 ToolKit package and run to install the ToolKit to your PC. The installation will also create a Shortcut on your desktop for easy access. You have the option to include or exclude the drivers files at installation so if you already have your drivers set up and are just updating the ToolKit then you can untick the drivers if you wish.

b. Once the ToolKit is installed make sure your phone is booted and plugged in via USB cable and double click on the 'Samsung GS3 ToolKit' shortcut on your desktop to run it.

c. You will be asked if you want to check for an Update. If you type 'yes' this will download and check the latest version numbers against the versions in the ToolKit. If there is an update available then you will have the option to download and install it (donator feature).

d. You will now be presented with a Model Selection Screen to choose the Model/Build that you are currently on. Type the number that corresponds to your desired selection. For example type '06' for GT-I9300 ELLA build. If you cannot find the build your device is using then type 'h' to select the HELP option to get more info.

e. The Toolkit will now locate and download the recovery/boot image pack for your chosen Model. This is a new feature so the Toolkit is not limited to how many Models can be added and it cuts down ALLOT on the download size. After the zip file has finished downloading it will be extracted to the correct folders and the files checked to make sure everything is ok.

f. When you enter the Main Menu you will see 'Adb Mode' at the top. If you have installed your drivers correctly then you will see your devices serial number under the text with 'device' next to it. If you see this then your device is connected and you can carry on.

NOTE: If you haven't installed the drivers and don't see a serial number at the top then this is the FIRST thing you want to do so the Toolkit can operate properly.

g. Each option in the ToolKit has full information on what it is and how to use it.

--------------------------------------------------------------

1. INSTALLING GALAXY S3 DRIVERS

The first thing you need to do is to install the drivers. These are needed so that you can communicate with the phone via the PC and perform the tasks that the ToolKit offers.

NOTE: If you have Kies installed then it is advisable to uninstall it first to avoid conflicts.

a. Make sure your device is booted into Android and the USB cable is unplugged.

b. Select Option 1 in the ToolKit to install the Samsung USB Driver pack. This should install all the neccessary drivers you need.

C. While the drivers are installing make sure that USB Debugging is enabled on your device via the Settings, Developer options Screen.

d. After the drivers have been installed connect the USB cable and the PC should detect the device and install the correct drivers. This will also happen when you enter Download Mode and Recovery Mode for the first time.

e. If you want to check the drivers then go to your Control Panel on your PC and open the Device Manager. With the USB cable connected you should see a device listed as 'Samsung Android Phone' or something similar and a driver attached to it.

--------------------------------------------------------------

3. FLASHING A ROM, RADIO, KERNEL OR ZIP FILE VIA CWM TOUCH RECOVERY

a. Download your chosen Rom, Radio or Kernel from the Development Forum, then make sure your phone is booted up as normal and connect your usb cable so it goes into MTP Mode. Copy the .zip file (DO NOT UNZIP IT FIRST) to the 'Internal Storage' part on your phone. Do not copy it to a Sub Directory as it will be harder to find when flashing it.

b. Enter CWM Touch Recovery (shut down the phone then hold down the 'HOME' + 'VOLUME UP' buttons and press the 'POWER' button for about 5 seconds).

c. Select 'Install zip from sdcard' and select 'choose zip from sdcard' if the file is on Internal Memory.

d. Scroll to your zip file and select. Then select 'Yes' in the list to start flashing.

e. When flashing is finished press the BACK Button to go back until you get to the Main Menu and then select 'reboot system now' to reboot your phone into Android.

--------------------------------------------------------------

3. FLASHING A ROM, RADIO, KERNEL OR ZIP FILE VIA TWRP TOUCH RECOVERY

a. Download your chosen Rom, Radio or Kernel from the Development Forum, then make sure your phone is booted up as normal and connect your usb cable so it goes into MTP Mode. Copy the .zip file (DO NOT UNZIP IT FIRST) to the 'Internal Storage' part on your phone. Do not copy it to a Sub Directory as it will be harder to find when flashing it.

b. Enter TWRP Touch Recovery (shut down the phone then hold down the 'HOME' + 'VOLUME UP' buttons and press the 'POWER' button for about 5 seconds).

c. Select 'Install' and select your file from the list if the file is on Internal Memory (for External Memory select it at the top).

d. Swipe your finger from left to right at the bottom to confirm the flash.

e. When flashing is finished select Reboot System or go back to Home for more options.
--------------------------------------------------------------

4. FLASHING A ROM, RADIO OR KERNEL VIA DOWNLOAD MODE USING ODIN

Odin can be used to flash image files or parts of your phone. You can flash something as simple as a boot image or a complete system. Everything is packed in a tar or tar.md5 file on your PC and flashed via Odin which is a Windows OS program.

a. Make sure you have your tar file stored on your PC.

b. Reboot your phone to Download Mode [shut down your phone, then hold down the Home + Volume DOWN Buttons and press the Power Button for about 2 seconds until a Warning screen appears. Press Volume UP to continue to Download Mode.

c. Connect your phone via usb and the first box at the top under ID:COM should turn blue and have some text in it. If you are using Download Mode on your phone for the first time then you will notice drivers being installed to use it.

d. The site or page you downloaded the file from will usually give you instructions to set Odin but if not you want to load boot/recovery/system files to the PDA location and have 'Auto Reboot' and 'F.Reset Time' ticked and nothing else.

e. Click on 'Start' to start the flash. You can see what is happening in the text box in the lower left.

--------------------------------------------------------------

USEFUL INFORMATION

How to get into Recovery Mode
1. Unplug the USB cable.
2. Shut down the phone.
3. Hold down the 'HOME' + 'VOLUME UP' buttons and press the 'POWER' button for about 5 seconds to enter Recovery Mode.

How to get into Download Mode (For Odin)
1. Unplug the USB cable.
2. Shut down the phone.
3. Hold down the 'HOME' + 'VOLUME DOWN' buttons and press the 'POWER' button for about 2 seconds until a WARNING! Screen appears. Press the 'VOLUME UP' button to enter Download Mode.

--------------------------------------------------------------

ChangeLog: (previous changelogs to the new unified version can be found *HERE*)

ToolKit v7.0 (10th January 2013)
+International and Snapdragon Toolkits have been unified into a single Galaxy S3 Toolkit
+Rewritten how the Toolkit works to keep all tasks common to other Toolkits in a seperate executable
+After model is selected the Toolkit will now download ONLY the files needed to cut down on install size
+Seperated all supported devices by model number
+Added support for new S3 variants
+Added support for latest builds on all models
+Updated all cwm and twrp recoverys to the latest version and given each model its matching recovery
+Updated SuperSU files by Chainfire to 0.99
+Added new root methods
+Added flash zip file by sideload function in recovery
+Fixed many functions and made other functions more accessible and easier to understand
+Added Instant Reply donation link to get codes out to people much quicker without waiting for a manual response
+Previous Snapdragon and International Toolkit codes will still work with the new unified version
+Soo many more changes to integration and operation I cant list them all

--------------------------------------------------------------
*DISCLAIMER*

I take no responsibility for any fault or damage caused by any procedures within this guide. No warranties of any kind are given.

Sunday, May 19, 2013

How to Root the Nexus 10 (unlock bootloader, and flash custom recovery guides included)

Nexus 10
The Google Nexus 10 is an impressive device from Google, it is an Android tablet developed by Google and Samsung, Nexus 10 has a 10.1-inch with 2560*1600 pixel display resolution. It was released on the end of the 2012 (November 13) and comes with two storage size models, one has 16 GB and the other one with 32 GB, it comes with Android 4.2 Jelly Bean which running on a CPU 1.7 GHz dual-core Cortex-A15 and 2 GB (12.8 GB/s LPDDR3) RAM memory.
Mali T604 GPU and multiple features like “Photo Sphere”, widgets on the lock screen, gesture typing and multiple user accounts for access in Nexus 10 tablet and so on, if you want to know more about this device you can visit the device page.
If you’re an owner for this tablet and you want enjoy of its maximum potential, you need to know how to unlock its bootloader, then to root it and to install a custom Recovery image on it. In this tutorial, we will teach you all this action in order to have all the control when you use your Nexus 10 tablet.
After you’ll install the Custom Recovery Image on your device you’ll be able to make a full backup of your existent ROM and all the data stored in your device, system data, the users data, personal data and all. Also, after you get the root access you can install and running the applications that required the root access and you’ll be able to customize your Nexus 10 device in what mode you want. But the main advantage is that you can easily replace your current Android OS with the new custom ROMs available for your device.
So, follow the next sections and be careful if you want to know how to easy unlock the bootloader, root and flash the custom recovery image in the Google Nexus 10 device.
Before to stating our tutorials you need to follow some prerequisites that are required to be applied before you begin the guides, so in the next guidelines you’ll find the prerequisites:
  • Firstly you need to know that, all the instructions and information in this article must be used only for Google Nexus 10 device, model no GT-P8110. Applying this tutorial for any other device can brick them or you can damage your device.
  • The instructions and all information listed here are provided only for educational and instructional purpose, and if you decide to use them for your device is only in your own risk.
  • The android.sc team shall not hold any responsibility or liability if you brick your device or lose any data applying the instructions from this article.
  • You need carefully read and understand all steps of the guides first, and after that you can perform the instructions.
  • You’ll need a computer near of you which running Windows Operating System, and the Google Nexus 10 GT-P8110 model device.
  • If you have a Linux or Mac OS PCs, then you can use our source to root your device, please visit via link at the end of article.
  • Install the proper drivers and in order to make able the communication between the Nexus 10 device and your PC, then install or be sure you have a zip extractor app like WinZip or 7-Zip, WinRAR, etc.
  • Make a full backup of your critical data that you have stored in your device, like SMS, Contacts, Call Logs, Internet Settings, applications, image files, video files, or any documents or file that you think are important for you. For backup methods,  you can use which method you are sure is safe or you can use our tutorial to save your data in the cloud or to save in your local PC.
  •  Verify the Nexus’s 10 battery level and charge it to be full power because of your device doesn’t have enough power left then can take a forced shutdown in the middle of the process.
  • Disable the antivirus and the firewall that you have installed on devices, your tablet and your PC. These applications can interfere with the rooting process and can interrupt it.
  •  I think these are all prerequisites that you need to follow before to move to then next section, so reread all the above points and don’t skip any step or the correct order for the same.

How to root the Nexus 10 devices and unlock its bootloader included – guide:

  1. Firstly download the CF Auto Root package for the Google Nexus 10 and save it in your computer
  2. Extract the downloaded file of the CF Auto Root pack on a folder on your computer; you’ll obtain 3 files and 2 sub-folders.
  3. Shutdown your Nexus 10 tablet completely.
  4. Connect your device to your PC using the original USB cord.
  5. Reboot your tablet into Bootloader Mode, to do this press and holding down in the same time Volume Up, Volume Down, and Power buttons, until the Bootloader Mode is displayed.
  6. Now, open the folder where you extracted the downloaded pack, and launch the script for starting the rooting process, to do that double-click on root-windows.bat file. You can make the same if you open a Command Prompt, then change directory when you the CF Auto Root files are extracted previously in your PC and enter: root-windows.bat command in the CMD (Command Prompt) window.
  7. After you entered the previous command a command prompt will appear with some warning text messages, press enter to continue.
  8. Now the script will begin to unlocking your Nexus’s 10 bootloader, when is done you will see a warning in the device’s display with bootloader unlocking warning message. Confirm that you want to unlock your device’s bootloader.
  9. After the bootloader has been unlocked, then the script will continue to root your Nexus 10 device.
  10. You’ll be notified with a red Android logo, and a text messages on your Nexus’s display as the rooting process goes on, and after that your Nexus 10 tablet will take a reboot.
  11. Now, press Enter in the CMD window to exit the script on your computer.
  12. Disconnect your tablet by removing the USB cable.
  13. That’s all in order to obtain the root access. Your tablet has been successfully rooted.
  14. Download and install the Root Checker from Google play store and verify if your tablet has the root access.

How to flashing the custom recovery image in Nexus 10 devices:

  1. Download one of the next custom recovery images: TWRP Recovery 2.4.1.0, or ClockworkMod Recovery 6.0.2.3,or  ClockworkMod Touch Recovery 6.0.2.3 and save it in your PC.
  2. Rename the custom recovery image file that you downloaded into recovery.img , that thing will help you to work with an easy name later.
  3. Now, transfer recovery.img file into the tools sub-folder that you extracted the rooting pack zip archive previously, the custom recovery image file need to be in the same folder with fastboot-windows.exe
  4. Now, reboot your Nexus 10 device to the Bootloader Mode.
  5. Connect your device to the PC using the USB cable.
  6. Open a Command Prompt (CMD) on your PC.
  7. Now, change directory in the path where the tools subfolder is in the main CF Auto Root pack file were extracted previously.
  8. Enter the following commands in the command prompt: fastboot-windows.exe flash recovery recovery.img and then fastboot-windows.exe reboot-bootloader.
  9. Now from the bootloader menu, select “RECOVERY MODE” using the Volume Keys, to choose it and press the power button to select it. Your Nexus 10 device will boot into Recovery Mode and will appear the menu of the custom Recovery Image that you have been installed on your device.
That’s all, now you successfully learnt how to root, unlock the boot-loader and flash a custom recovery image for the Nexus 10 device. Please let us know if the guides work for you and if you have problems with some instructions that we have listed here, describe us exactly what happens, and we will try to find the best solution for you.
Via

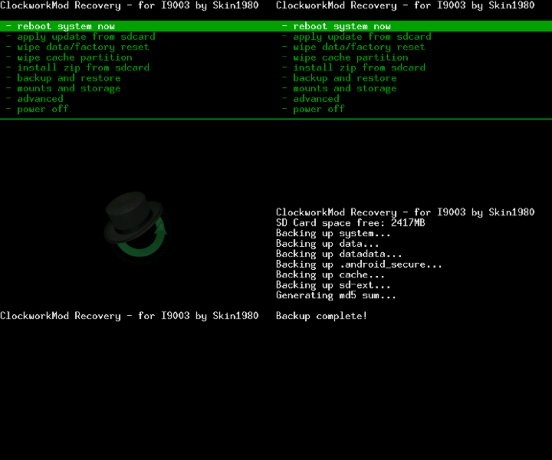
How to Flash a Custom Recovery on the Samsung Galaxy SL (GT-I9003)

Custom Recovery for the Samsung Galaxy SL
Samsung Galaxy SL has been lucky enough to get a custom recovery for it and that too the ClockworkMod. It’s an awesome custom recovery that once flashed, takes place of stock recovery and provides far more and better features than the stock one. Flashing it on your Galaxy SL shouldn’t take more than a few minutes and our guide below will help you to do that. So, get ready to flash a custom recovery on your Galaxy SL smartphone.

I. Before You Begin:

1. You must have rooted your device before doing this procedure. Check out our How to Root the Samsung Galaxy SL procedure to root your device.
2. This should replace your current recovery with the CWM Recovery.
3. This works on Windows based PCs only.

II. Downloading Required Files:

1. ClockworkMod Recovery (Download the appropriate recovery from the first post)
2. Odin

III. Flashing a Custom Recovery on the Samsung Galaxy SL (GT-I9003):

1. Place both the files you downloaded to your Desktop.
2. Extract files from the Odin archive over to your Desktop.
3. Double-click on the Odin executable file and it’ll open.
4. Click on PDA and select the CWM Recovery file you downloaded earlier to your Desktop.
5. Checkmark the boxes that say Auto Reboot and F. Reset Time.
6. Make sure you haven’t checked the Repartition box.
7. Turn OFF your device.
8. Reboot your device into Download mode. To do so, simply hold down the Volume DOWN+Home+Power buttons together.
9. Once inside Download mode, connect your device to your PC using the USB cable.
10. Hit Start in Odin and it’ll start flashing the recovery.
11. Once the recovery’s been flashed, your device should automatically reboot.
12. You’re done!
Great! You’ve successfully flashed the CWM Recovery on your device and you should be able to use it to flash custom ROMs right away!

IV. Flash a Custom ROM (Optional):

1. If you are ready to flash custom ROMs on your device, head to the How To Flash a Custom ROM on the Samsung Galaxy SL (GT-I9003) to learn how to do that.
If this procedure helped you please thank/donate to the original developers here.
If you need help with this procedure, please ask in the comments below.

How to Root and Flash Custom Recovery on Samsung Galaxy SL (GT-I9003)

Root the Samsung Galaxy SL (GT-I9003)
Maybe you’re looking to run some root-only apps on your device? Maybe you want the freedom that your friend’s having with his rooted Android device? No problem, we’ll help you root your device. The Samsung Galaxy SL can be rooted using the popular SuperOneClick app and this guide walks you through all the steps to root the device. So, follow it and get your device rooted.

I. Before You Begin:

1. Be aware that rooting your device will void its warranty. However, unrooting should help you reinstate the warranty provided an unrooting procedure’s available there.
2. This works on Windows based PCs only.

II. Downloading Required Files:

1. SuperOneClick (Download the latest version of the app)

III. Rooting the Samsung Galaxy SL (GT-I9003):

1. Download and place the app archive onto your Desktop.
2. Extract files from the archive over to your Desktop.
3. Turn ON the USB debugging option on your device by heading to Menu>>Settings>>Applications>>Development>>USB debugging.
4. Once enabled, connect your device to your PC via USB cable.
5. Run the SuperOneClick app by double-clicking on its executable file.
6. Click Root button in the app and it’ll start rooting your device.
7. Once it’s done, reboot your device.
8. You’re done!
Awesome! Your device has been rooted and you should be able to find the Superuser app in your App Drawer. Your phone is now ready to be loaded with root-only apps!

IV. Flash a Custom Recovery Image (Optional):

1. If you would like to flash a custom recovery image in order to flash custom ROMs, head to the How To Flash a Custom Recovery Image on the Samsung Galaxy SL (GT-I9003) to learn how to do that.
If this procedure helped you please thank/donate to the original developers here and here.
If you need help with this procedure, please ask in the comments below.

How to Root Galaxy Tab 7.0 Plus P6200 on Android 4.1.2 XXMD6 Jelly Bean and Install ClockworkMod recovery

Samsung recently rolled out the Android 4.1.2 XXMD6 Jelly Bean official update to the Galaxy Tab 7.0 Plus with model number P6200. The XXMD6 Jelly Bean is an unbranded version of firmware and can be installed using Samsung KIES server. Also, users from supported regions can manually update their tablet with the latest official build using Odin flashing tool.  
Android 4.1.2 XXMD6 Jelly Bean firmware is released for Galaxy Tab 7.0 Plus.

Galaxy Tab 7.0 Plus users who have already updated their device and are currently looking for a root method may follow our step-by-step guide. The tutorial includes installation of ClockworkMod (CWM) recovery and rooting the Galaxy tablet. Both the recovery file and Superuser file used for rooting have been released by XDA developer acme1974. Head over to the source page to learn more about the release.

1) Install USB driver for Samsung Galaxy Tab 7.0 Plus to transfer files between the Android device and computer.
2) Enable USB Debugging Mode on the tablet to connect the Android device with the computer and use the Android SDK with it. [Press Menu>> Settings>> Applications. From there navigate and click on Development option and ensure the USB Debugging Mode is turned on.]
3) As the tutorial might wipe all data of the phone, create a backup. If the device is having any custom recoveries such as CWM/TWRP already installed then backup data using the recovery.    
4) The device should have above 80% battery charge.
5) The Galaxy tablet should be factory unlocked and not locked to a particular carrier.
6) The tablet will lose manufacturer's warranty once it is rooted, but users can reclaim the warranty by unrooting the device later.
7) The recovery file and the Superuser file work only on the Samsung Galaxy Tab 7.0 Plus P6200. As applying these to any incorrect variant might brick the device, verify the model number of the Galaxy device by selecting Settings>> About device>> Model number
Files required to download  
Download recovery.tar.rar file
Download Superuser-3.1.3-arm-signed.zip
Download Odin3 v3.07
Steps to install CWM recovery on Samsung Galaxy Tab 7.0 Plus P6200
Step-1: Extract the recovery.tar.rar file using winrar/7zip/winzip or any other extracting tool  
Step-2: Extract the Odin3_v3.07.rar    
Step-3: Copy the Superuser-3.1.3-arm-signed.zip file to the external SD card of the tablet
Step-4: Switch off the Galaxy tablet. Then boot the device into Download Mode by pressing and holding Volume Down and Power buttons together. A warning message will appear. Now press the Volume Down button to continue to enter Download Mode
Step-5: Run Odin on the computer
Step-6: Connect the Galaxy tablet to the computer using USB cable while it is in the Download Mode. Wait until Odin detects the device. When the tablet is connected successfully to the computer, the ID: COM port will turn yellow. The successful connection will be indicated by an Added message in Odin.
If the Added message does not come, then try the USB port at the back of the computer. It that too does not work, then re-install USB driver  
Step-7: In Odin, click the PDA button and select recovery.tar.md5 file  
Step-8: Verify the Auto Reboot and F.Reset Time checkboxes are selected in Odin. But uncheck the Re-Partition option
Step-9: Double check everything and then finally hit the Start button in Odin. The installation process should begin now
Step-10: When the installation process is completed, the tablet will reboot automatically. Once the home screen appears on the tablet, unplug the USB cable from the device to disconnect it from the computer
Steps to root Galaxy Tab 7.0 Plus P6200 on Android 4.1.2 XXMD6 Jelly Bean by installing SuperSU
Step-1: Reboot the Galaxy Tab 7.0 Plus into the recovery mode by pressing and holding the Volume Up and Power buttons together
Step-2: In recovery mode, select install zip from sdcard then select choose zip from sdcard. Then navigate to the Superuser-3.1.3-arm-signed.zip file. Select it using the Power button and confirm installation by selecting Yes on the next screen  
Step-3: Once the installation process is done, return to the main recovery menu and reboot the tablet by selecting reboot system now.    
As the Samsung Galaxy Tab 7.0 Plus boots up successfully, it should be rooted successfully on Android 4.1.2 XXMD6 Jelly Bean with CWM recovery installed on the device.
To ensure the above root method is installed and working properly, download Root Checker app from Google Play Store.
[Source: Honai of Android]

[HOWTO] [ROOT] No Tripping Flash Counter - [ATT / Bell / Telus / Rogers / Sasktel]

Please make sure you download the correct image for your phone. ATT / Bell / Telus / Rogers / Sasktel
This method uses Odin to flash a factory stock image to your phone that simply has root injected into it. These are FULL stock and as such will flash the stock bootloader, recovery, modem, kernel and system image.

Video posted of this and other options for root. Good to watch before starting if you are new!
And a great new user FAQ compiled by our Member of the Month winner, ikjadoon!


You can get ODIN here
and the drivers for the SGH-I747 so ODIN can detect your phone can be found at Samsung's site. Click on the Manuals & Downloads tab at the bottom and then on Software for the latest driver.

First download the stock odin tar that has a rooted system image injected into it:
ATT Image
Current I747UCDLK3 (JB 4.1.1) - NEW JellyBean
Mirror 1: Download root66_ATT_I747UCDLK3.7z
Mirror 2: Download root66_ATT_I747UCDLK3.7z

------------------------------------------------------------------------------------------------------------------------------------------------------------------------------------------------------------
Old Image ATT I747UCALG1 (ICS 4.0.4)
Perm Mirror 1: ATT Stock Download I747UCALG1 - 570.9 MB
md5sum: f9a8516fc16b81c1caad0459a4e1bcaf root69_ATT_I747UCALG1.7z
Perm Mirror 2: Thanks to creepyncrawly!: ATT Stock Download I747UCALG1 - 570.58 MB
md5sum: 2d3c950883f82d7aae4b0c2a073140ca root69.stock_ATT_I747UCALG1.7z

If you want the universal search back that the above update has removed then simply replace the apk below into /system/app/
Perm Mirror 1: Download GoogleQuickSearchBox

AT&T Users wanting latest ICS only The last full ICS rom that was released was LG1. The latest OTA for ICS is LH9.
After following the steps outlined below you should then head over to this thread if you want to apply the OTA updates and retain root.
Note: if your phone shipped with LH9 you will want to perform a factory reset in stock recovery before performing the below otherwise you'll get errors when you boot into your system.


------------------------------------------------------------------------------------------------------------------------------------------------------------------------------------------------------------

Bell Image (This works with Canadian Virgin Mobile SGH-I747M)
Current I747MVLDLK4 (JB 4.1.1)
Mirror 1: Download root66_BMC_I747MVLDLK4.7z

Old Image I747MVLALH1 (ICS 4.0.4)
Perm Mirror 1: Bell I747MVLALH1 Download
Perm Mirror 2: Thanks to zaghy2zy!: Bell I747MVLALH1 Download


Rogers Image
Current I747MVLDLK4 (JB 4.1.1)
Mirror 1: Download root66_RWC_I747MVLDLK4.7z

Old Image I747MVLALH1 (ICS 4.0.4)
Perm Mirror 1: Rogers I747MVLALH1 Download
Perm Mirror 2: Thanks to zaghy2zy!: Rogers I747MVLALH1 Download


Telus Image
Current I747MVLDLK4 (JB 4.1.1)
Mirror 1: Download root66_TLS_I747MVLDLK4.7z

Old Image I747MVLALH1 (ICS 4.0.4)
Perm Mirror 1: Telus I747MVLALH1 Download
Perm Mirror 2: Thanks to zaghy2zy!: Telus I747MVLALH1 Download


Sasktel Image
Current I747MVLDLK4 (JB 4.1.1)
Mirror 1: Download root66_BWA_I747MVLDLK4.7z

Old Image I747MVLALH1 (ICS 4.0.4)
Perm Mirror 1: Sasktel I747MVLALH1 Download
Perm Mirror 2: Thanks to zaghy2zy!: Sasktel I747MVLALH1 Download

Fido Image
Current I747MVLDLK4 (JB 4.1.1)
Mirror 1: Download root66_FMC_I747MVLDLK4.7z

Puerto Rico Image - New!
Current I747MUMBLL1 (JB 4.1.1)
Mirror 1: Download root66_PCT_I747MUMBLL1.7z

Koodoo Mobile Image - New!
Current I747MVLDLK4 (JB 4.1.1)
Mirror 1: Download root66_KDO_I747MVLDLK4.7z

Second,
Extract the root66_xxx_.tar.md5 from the .7z file you downloaded.
Use Odin, put phone into download mode [with phone off, hold vol. down + home + power ], connect to computer and open Odin.
once in odin click the PDA field and select the root66_xxx_.tar.md5 you downloaded.
Leave Auto Reboot and F. Reset Time checked.
click start and
when done let phone reboot.
If you have issues flashing with Odin please ensure you are using the microusb cable that came with the phone, users have had issues using other cables.
If you just want a stock, rooted phone with no custom recovery, no plans to flash custom roms, etc. then you can stop HERE.

Third, (optional) On JellyBean versions, flashing a custom recovery will trip your counter no matter the method used.
To get clockworkmod recovery loaded so you can flash whatever you want, nandroid, etc then continue on....
Once rebooted you can grab a universal recovery that works on all sgs3 LTE variants from here: http://www.epiccm.org/2012/06/cwm-re...-variants.html
if you download this recovery you will need to extract this file (if you have issues extracting try removing the .md5 extension first) to get a recovery.img file and copy to your phone's internal /sdcard

However if you have the ATT model (not sure if this will work on Bell, Telus, Rogers, etc.), this recovery will see the extSdCard and seems better for our devices:
For ATT models use either this recovery or this touch recovery.

connect your phone to computer and use adb
type adb shell
once in the shell run su
then
dd if=/sdcard/recovery.img of=/dev/block/mmcblk0p18

Third, alternate if unfamiliar with adb commands
Grab android terminal emulator from the play store and run the same commands starting with su in the box below.

Here is output of what I did (using the att non-touch recovery file):
Code:
shell@android:/ $ su
shell@android:/ # dd if=/sdcard/recovery-clockwork-5.8.4.5-d2att.img of=/dev/block/mmcblk0p18
14004+0 records in
14004+0 records out
7170048 bytes transferred in 1.430 secs (5014019 bytes/sec)
shell@android:/ # 

shell@android:/ # reboot recovery
Third, alternate #3 if unfamiliar with adb commands and uncomfortable using any command line
Decide if you want to use TWRP or CWM.
If you would like to install ClockworkMod recovery then grab Rom Manager from the Play store and in the menu select to install ClockworkMod Recovery.
If you would like to install TeamWin Recovery Project then grab GooManager from the Play store and select the option to "Install OpenRecovery Script".


Using the method's above, at least in my two tests, wiped nothing off my phone. everything in sdcard remained etc.

ADB Install/Setup info found in post #3 of tomween1's [DIRECTORY] AT&T SGS lll I747 thread

De-Bloater
If you've made it this far with a stock, rooted phone with cwm and you don't want to flash a custom rom (which will do its own de-bloating) you can check out my Aroma installer based De-bloater to easily get rid of bloat system apps you no longer want to see. Simply flash in CWM like anything else and you will be presented with a menu system to choose what to remove. If you are unsure it is safe to pick Recommended and still get a decent de-bloat.
Miscellaneous Files
Odin Flashable TWRP Recovery - This is an Odin Flashable Team Win Recovery Project Recovery - openrecovery-twrp-2.3.1.0-d2att.tar.md5
Odin Flashable Stock ATT UCDLK3 Recovery - This is an Odin Flashable STOCK Recovery for ATT from UCDLK3 release - ATT_recovery_I747UCDLK3.tar.md5
CWM Flashable ATT UCDLK3 Modem - modem_CWM_I747UCDLK3.zip

Thanks
To get the injected root system image I followed pieces of
http://forum.xda-developers.com/show...04&postcount=1
http://forum.xda-developers.com/show...8&postcount=32

so thanks to those guys. Neither of those worked out of the box needed a bit of tweaking.

Thanks to pinoymutt for this: http://forum.xda-developers.com/show...1&postcount=26
which is the method above to getting recovery in without tripping counter.
Please see the original thread here.

[GALAXY NOTE 8.0 TOOLKIT V1.1] Drivers, Backup, Root, Recovery, Flash + MORE


INTRODUCING THE SAMSUNG GALAXY NOTE 8.0 TOOLKIT

IMPORTANT: THIS TOOLKIT SUPPORTS 2 DIFFERENT VARIANTS SO MAKE SURE YOU SELECT THE CORRECT MODEL FOR YOUR DEVICE IN THE MODEL SELECTION SCREEN OR INCORRECT BOOT IMAGES WILL BE DOWNLOADED WHICH COULD SOFT BRICK YOUR DEVICE.

Quote:
SUPPORTED MODELS
GT-N5100 3G/WIFI MODEL
GT-N5110 WIFI ONLY MODEL
FUNCTIONS OF SAMSUNG GALAXY NOTE 8.0 TOOLKIT V1.1
  • Install drivers automatically
  • Backup/Restore a single package or all apps, user data and Internal Storage
  • Backup your /data/media (virtual SD Card) to your PC for a Full Safe backup of data
  • Perform a FULL NANDROID Backup of your system via adb and save in Custom Recovery format on your PC
  • Pull /data and /system folders, compress to a .tar file and save to your PC
  • Auto Update ToolKit to latest push version on startup (professional feature)
  • Dump selected Phone Partitions, compress to a .zip file with md5 and save to your PC
  • Install BusyBox binary on phone
  • ROOT ANY PUBLIC BUILD (different options available)
  • [B]Root with Superuser (ChainsDD) or SuperSU (Chainfire) via CWM (works on ANY build)
  • Install any zip file via Sideload feature in Recovery
  • Flash CWM Touch Recovery (thanks to emwno for porting it) or TWRP Recovery (still being ported by emwno)
  • Rename Recovery Restore files if present
  • Flash Insecure Boot Image for adb mode
  • Flash Stock Boot Image back to your phone
  • Create tar file to flash via Odin with 1-click process
  • Download, Extract and Flash Stock Rom (full DETAILED steps) ESSENTIAL FOR WARRANTY RETURNS
  • Rip cache.img to zip file in CWM format for editing and flashing (thanks to Adam Lange)
  • Install a single apk or multiple apk's to your phone
  • Push Files from your PC to your phone
  • Pull Files from your phone to your PC
  • Set Files Permissions on your phone
  • Dump selected LogCat buffers to your PC
  • Dump Bug Report to your PC (if installed)
  • Help, Information Screen for various tasks
  • Mods Section to Modify your phone
  • Reboot Phone options in adb mode
  • Change background, text colour in ToolKit
  • Activate Professional version from the Model Selection screen (much easier)
--------------------------------------------------------------

**CLICK HERE TO DOWNLOAD THE SAMSUNG GALAXY NOTE 8.0 TOOLKIT V1.1**

NOTE: As the exe files are not Digitally Signed with a Microsoft Certificate they 'may' get picked up as potentially harmful by Antivirus Programs and deleted on first run. If this happens restore the file and exclude it from future scans to use it. This seems to happen mostly on AVG Free and Norton which is why I switched to BitDefender which is much better.

IMPORTANT: ONLY FLASH ROMS THAT ARE SPECIFICALLY MADE FOR YOUR PHONES MODEL NUMBER AS FLASHING AN INCORRECT ROM CAN POTENTIALLY BRICK YOUR DEVICE!

--------------------------------------------------------------

Credits: Thanks to emwno for his work on porting cwm and twrp to the Note 8.0, koush and the clockworkmod team for cwm recovery, twrp team for twrp recovery, lastly thanks to Chainfire for SuperSU and all the work he does for the community.

--------------------------------------------------------------

WHAT IS THE DIFFERENCE BETWEEN PUBLIC (FREE) AND PROFESSIONAL (DONATE) VERSIONS?
THE FREE PUBLIC VERSION OF THE TOOLKIT INCLUDES EVERYTHING YOU COULD POSSIBLY NEED TO MANIPULATE YOUR PHONE. NOTHING IS RESTRICTED. ACTIVATING THE DONATE VERSION WILL ADD THE ABILITY TO CHECK FOR UPDATES VIA THE TOOLKIT AND HAVE THEM PUSHED TO YOUR PC RIGHT AWAY AS SOON AS THEY ARE UPLOADED TO MY SERVER WITHOUT NEEDING TO DOWNLOAD THE WHOLE TOOLKIT EVERY TIME. THIS ALSO MEANS SMALLER UPDATES CAN BE SENT OUT MORE FREQUENTLY SUCH AS ADDING A SINGLE FUNCTION, FIXING A BUG OR ADDING COMPATIBILITY FOR A SINGLE VARIANT OR CARRIER SO DONATOR VERSIONS WILL BE UPDATED SOONER. IF YOU ARE NOT ABLE TO, OR DO NOT WANT THE AUTO UPDATE FEATURE THEN ALL UPDATES WILL BE COMPILED AND RELEASED TO THE XDA COMMUNITY AS A FULL DOWNLOAD VERSION AS SOON AS TIME ALLOWS AND THERE ARE ENOUGH UPDATES TO WARRANT IT. DONATORS WILL ALSO HAVE THE QUICK PICKS AND EXTRAS SECTIONS UNLOCKED AND THE 'NAG' SCREEN ON EXIT WILL BE DISABLED. NEW DONATOR FEATURES WILL ALSO BE ADDED TO THE TOOLKIT IN THE FUTURE.

AUTO REPLY LINKS FOR PAYPAL AND GOOGLE CHECKOUT TO GET A CODE INSTANTLY CAN BE FOUND AT http://goo.gl/nyGqv

AUTO UPDATES ARE BY FAR THE EASIEST WAY TO KEEP THE TOOLKITS UP TO DATE AS I HAVE LOTS OF OTHER TOOLKITS TO LOOK AFTER. IF ANYONE HAS ANY VIEWS ON THIS PLEASE PM ME OR CONTACT ME AT TOOLKIT.SUPPORT@SKIPSOFT.NET. PLEASE DO NOT POST YOUR VIEWS IN THIS THREAD AS I WANT TO KEEP IT CLEAN FOR USER SUPPORT.


(Changelog at the Bottom of Post#1)

--------------------------------------------------------------

PLEASE READ THE *FAQ* IN POST#2 BEFORE ASKING QUESTIONS

--------------------------------------------------------------

2. USING MSKIPS' SAMSUNG GALAXY NOTE 8.0 TOOLKIT

a. Download the Samsung Galaxy Note 8.0 ToolKit package and run to install the ToolKit to your PC. The installation will also create a Shortcut on your desktop for easy access. You have the option to include or exclude the drivers files at installation so if you already have your drivers set up and are just updating the ToolKit then you can untick the drivers if you wish.

b. Once the ToolKit is installed make sure your phone is booted and plugged in via USB cable and double click on the 'Samsung Note 8.0 ToolKit' shortcut on your desktop to run it.

c. You will be asked if you want to check for an Update. If you type 'yes' this will download and check the latest version numbers against the versions in the ToolKit. If there is an update available then you will have the option to download and install it (professional feature).

d. You will now be presented with a Model Selection Screen to choose the Model/Build that you are currently on. Type the number that corresponds to your desired selection. For example type '11' for 3G/WIFI MODEL [GT-N5100] 4.1.2 BMC9-BMD1 builds. If you cannot find the build your device is using then type 'h' to select the HELP option to get more info.

NOTE: If you have a new build that isnt covered by the Toolkit you can also type 'a' in the Model Selection screen to see instructions on how to pull your stock image and send it to firmware.support@skipsoft.net so support can be added.

e. The Toolkit will now locate and download the boot image pack for your chosen Model. This is a new feature so the Toolkit is not limited to how many Models can be added and it cuts down ALOT on the download size. After the zip file has finished downloading it will be extracted to the correct folders and the files checked to make sure everything is ok.

f. When you enter the Main Menu you will see 'Adb Mode' at the top. If you have installed your drivers correctly then you will see your devices serial number under the text with 'device' next to it. If you see this then your device is connected and you can carry on.

NOTE: If you haven't installed the drivers and don't see a serial number at the top then this is the FIRST thing you want to do so the Toolkit can operate properly.

g. Each option in the ToolKit has full information on what it is and how to use it.

--------------------------------------------------------------

1. INSTALLING SAMSUNG DRIVERS

The first thing you need to do is to install the drivers. These are needed so that you can communicate with the phone via the PC and perform the tasks that the ToolKit offers.

NOTE: If you have Kies installed then it is advisable to uninstall it first to avoid conflicts.

a. Make sure your device is booted into Android and the USB cable is unplugged.

b. Select Option 1 in the ToolKit to install the Samsung USB Driver pack. This should install all the neccessary drivers you need.

C. While the drivers are installing make sure that USB Debugging is enabled on your device via the Settings, Developer options Screen.

d. After the drivers have been installed connect the USB cable and the PC should detect the device and install the correct drivers. This will also happen when you enter Download Mode and Recovery Mode for the first time.

e. If you want to check the drivers then go to your Control Panel on your PC and open the Device Manager. With the USB cable connected you should see a device listed as 'Samsung Android Phone' or something similar and a driver attached to it.

--------------------------------------------------------------

3. FLASHING A ROM, RADIO, KERNEL OR ZIP FILE VIA CWM TOUCH RECOVERY

a. Download your chosen Rom, Radio or Kernel from the Development Forum, then make sure your phone is booted up as normal and connect your usb cable so it goes into MTP Mode. Copy the .zip file (DO NOT UNZIP IT FIRST) to the 'Internal Storage' part on your phone. Do not copy it to a Sub Directory as it will be harder to find when flashing it.

b. Enter CWM Touch Recovery (shut down the phone then hold down the 'HOME' + 'VOLUME UP' buttons and press the 'POWER' button for about 5 seconds).

c. Select 'Install zip from sdcard' and select 'choose zip from sdcard' if the file is on Internal Memory.

d. Scroll to your zip file and select. Then select 'Yes' in the list to start flashing.

e. When flashing is finished press the BACK Button to go back until you get to the Main Menu and then select 'reboot system now' to reboot your phone into Android.

--------------------------------------------------------------

3. FLASHING A ROM, RADIO, KERNEL OR ZIP FILE VIA TWRP TOUCH RECOVERY

a. Download your chosen Rom, Radio or Kernel from the Development Forum, then make sure your phone is booted up as normal and connect your usb cable so it goes into MTP Mode. Copy the .zip file (DO NOT UNZIP IT FIRST) to the 'Internal Storage' part on your phone. Do not copy it to a Sub Directory as it will be harder to find when flashing it.

b. Enter TWRP Touch Recovery (shut down the phone then hold down the 'HOME' + 'VOLUME UP' buttons and press the 'POWER' button for about 5 seconds).

c. Select 'Install' and select your file from the list if the file is on Internal Memory (for External Memory select it at the top).

d. Swipe your finger from left to right at the bottom to confirm the flash.

e. When flashing is finished select Reboot System or go back to Home for more options.
--------------------------------------------------------------

4. FLASHING A ROM, RADIO OR KERNEL VIA DOWNLOAD MODE USING ODIN

Odin can be used to flash image files or parts of your phone. You can flash something as simple as a boot image or a complete system. Everything is packed in a tar or tar.md5 file on your PC and flashed via Odin which is a Windows OS program.

a. Make sure you have your tar file stored on your PC.

b. Reboot your phone to Download Mode [shut down your phone, then hold down the Home + Volume DOWN Buttons and press the Power Button for about 2 seconds until a Warning screen appears. Press Volume UP to continue to Download Mode.

c. Connect your phone via usb and the first box at the top under ID:COM should turn blue and have some text in it. If you are using Download Mode on your phone for the first time then you will notice drivers being installed to use it.

d. The site or page you downloaded the file from will usually give you instructions to set Odin but if not you want to load boot/recovery/system files to the PDA location and have 'Auto Reboot' and 'F.Reset Time' ticked and nothing else.

e. Click on 'Start' to start the flash. You can see what is happening in the text box in the lower left.

--------------------------------------------------------------

USEFUL INFORMATION

How to get into Recovery Mode
1. Unplug the USB cable.
2. Shut down the phone.
3. Hold down the 'HOME' + 'VOLUME UP' buttons and press the 'POWER' button for about 5 seconds to enter Recovery Mode.
Note: If you cannot get into Recovery by using the buttons then you can reboot to it from the Toolkit 'reboot device' section.

How to get into Download Mode (For Odin)
1. Unplug the USB cable.
2. Shut down the phone.
3. Hold down the 'HOME' + 'VOLUME DOWN' buttons and press the 'POWER' button for about 2 seconds until a WARNING! Screen appears. Press the 'VOLUME UP' button to enter Download Mode.

--------------------------------------------------------------

Changelog:
ToolKit v1.1 (29th April 2013)
+Updated cwm recovery [ported by emwno] to Ex4 which is almost perfect now [TWRP still being worked on]
+Updated some of the Toolkit procedures
+Minor improvements

ToolKit v1.0.0test2 (26th April 2013)
+Initial test release

--------------------------------------------------------------
*DISCLAIMER*

I take no responsibility for any fault or damage caused by any procedures within this guide. No warranties of any kind are given.

Full credit to the developer. Please see this link.